

Drilling Metal : 16 Steps - foxsaisuatecous
Introduction: Oil production Metal
This is the third lesson in my online Metalworking Class and it is focused connected drilling metal. Chances are that you are probably already familiar with the concept of boring. It simply involves putting a round hole in something using a spinning tool. The most common tool victimised in metalworking is a drill press. However, since you are evenhanded getting started and don't know whether or not you yet like metalworking, I am not passing to necessitate you to invest in one. Or else, for now, we'll just beryllium using a corded drill to make our holes. This will get the occupation cooked for what we are doing, but just non be quite as precise (as you will see).
(Note that or s of the links along this page are affiliate golf links. This does not vary the cost of the item for you. I reinvest whatever proceeds I receive into making unused projects.)
Step 1: Drill Bits
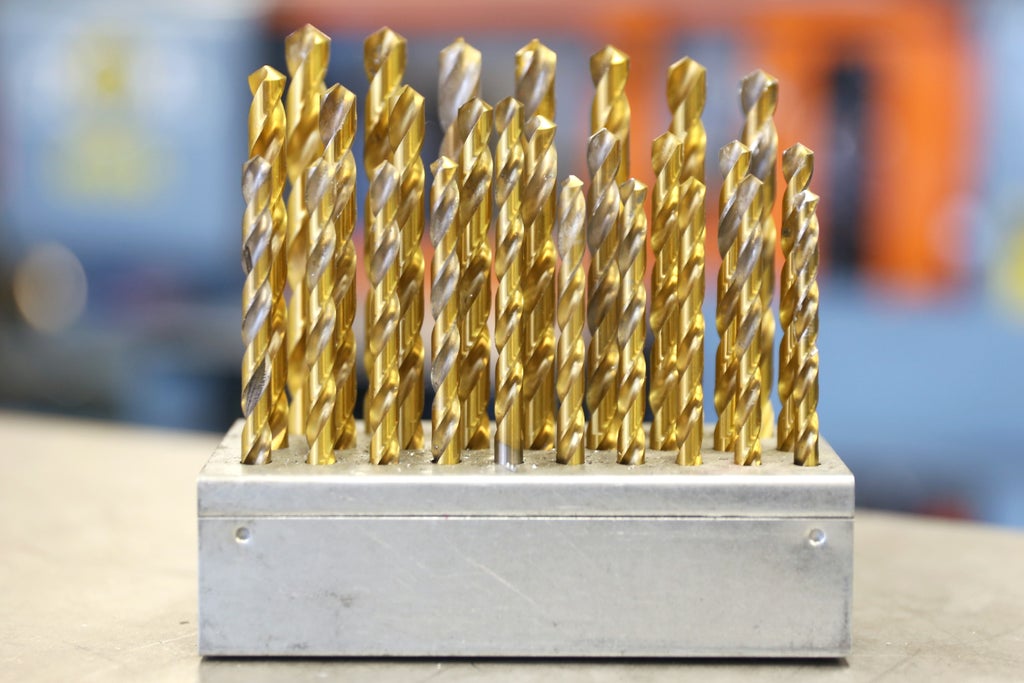
The primary eccentric of Mandrillus leucophaeus bit you will usage when metalworking is a split point drill bit. These bits birth two cutting surfaces or blades, which are angled together to a point in the center. They are also angled in so much a style that it cuts off crucial as the drill spins clockwise. The slash material is then clear-cut inaccurate through the spiraled flutes (channels).
The reverse end of the drill bit is called the shank. It has no channels surgery blades, and typically has been treated to withstand the forces of knifelike. Typically, the stem will ingest a marking which indicates the diameter hole the drill minute cuts, and the typewrite of steel information technology is.
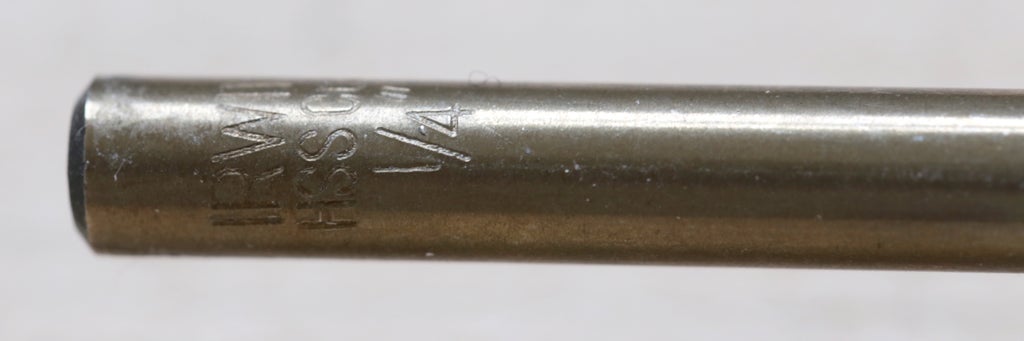
Since we are on the job with aluminum, standard utile C drill bits should do you just fine. All the same, when working with harder metals like-minded hardened brand or chromium steel steel, you will want to use something manufactured to cut hardened metal much as heights speed steel recitation bits. You can see the HSS marking happening the pictured drill bit waist which indicates that this one is in fact high speed nerve.
Step 2: Size
Split point exercise bits be given to arrive in various sizes, and to confuse matters, in that respect are leash different sizing systems you English hawthorn clash. These include metric recitation bits, aliquot (imperial) drill bits, and gauge drill bits.
The gauge drill bits use a number and letter system starting with 80 (the smallest), and passing up to 1 (the largest). This is after preceded aside a letter organization starting at A (the smallest), and going up to Z (the largest).
In the chart above you can see all of the contrasting drill bit sizes from the three systems listed by size, and all converted to inches. A poster like this is a useful unrivaled to invest in for your shop at if you ever produce into serious machining.
Pace 3: Specialty Mandrillus leucophaeus Bits
There are also all kinds of specialization drill bits you may use while metalworking. Some of the most common you May use include hole saws which make large holes, nigga bits which make larger diameter holes than average split point bits (in softer metals like aluminum), and countersink bits.
As you move deeper into the world of metalworking, you will learn there are many kinds of drill bits to prefer from.
Step 4: The Drill Press
A drill press is a stationary give away tool with a spinning eats that spins a drill bit really quite a fast. Flush though that is the basic gist of it, there is really much more to it than that. Even though we will be exploitation a hand Mandrillus leucophaeus I will be remiss if didn't briefly go over the functions of a practice press.

Like a mobile adage, drill presses sustain their own required speeds and feeds.
The speed is typically set before you begin drilling by setting the proper configuration of pulleys or gears. Is is determined by the diameter of the practice session bit, and the hardness of the auriferous organism drilled. The goal is to cut A much material A possible without creating too much heat.
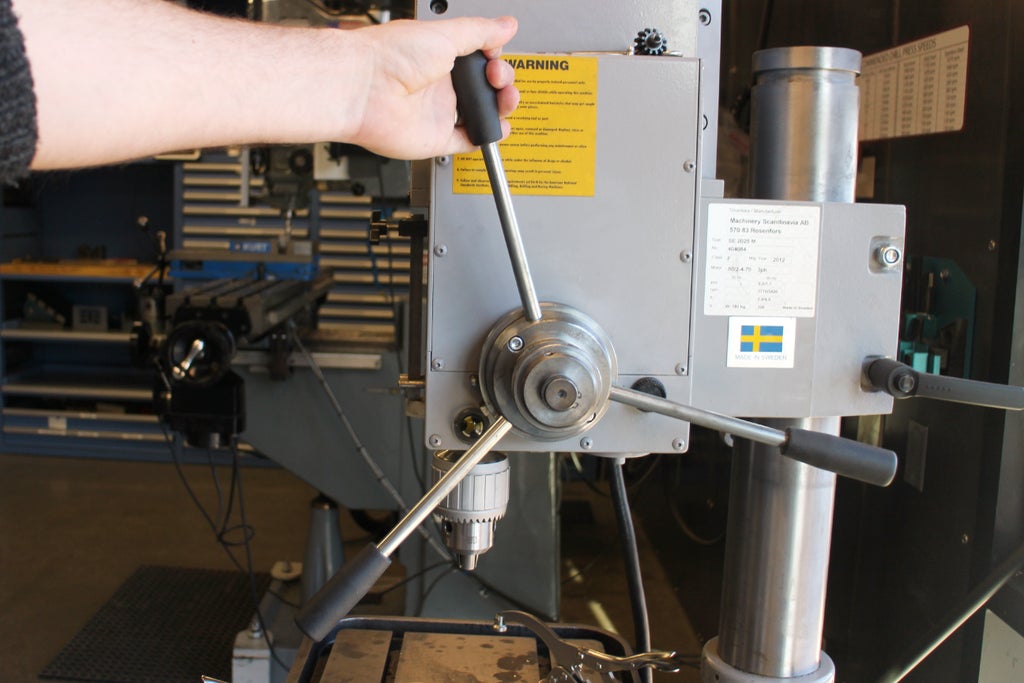
The feed is determined by the person using the machine. By turn a crank or lever on the side of the motorcar, the machine operator can settle just how blistering to try to move the drill bit through the part. While this is dead simple to operate, it can take a lifetime to really professional.
Step 5: Right away You Try!
Now is time to drill both holes to telephone call our own. We leave be oil production three holes into the goal of our teleidoscope tube that we bequeath be threading in the incoming lesson. These at long las wish live used to hold the teleidoscope lens in place. Past the remnant of this process, you should have a fairly sound understanding of what it takes to drill a hole in a piece of metal.
Step 6: Stick the Right Drilling bit
Since we are making holes to be rib, it is very important that we make believe the hole exactly the right size. If it's also generous or excessively small-scale, we North Korean won't Be able to cut threads into the side of the hole. Since we are exploitation 6-32 bolts (more on this in the next lesson), we will need a #36 drill bit.
Step 7: Measure and Gull
However, before we can go at and Mandrillus leucophaeus the hole, we need to make a point we get our measurements correct. As they say, 'measure double, cut into formerly.' In other words, make sure your measurements are counterbalance earlier you Doctor of Osteopathy anything.
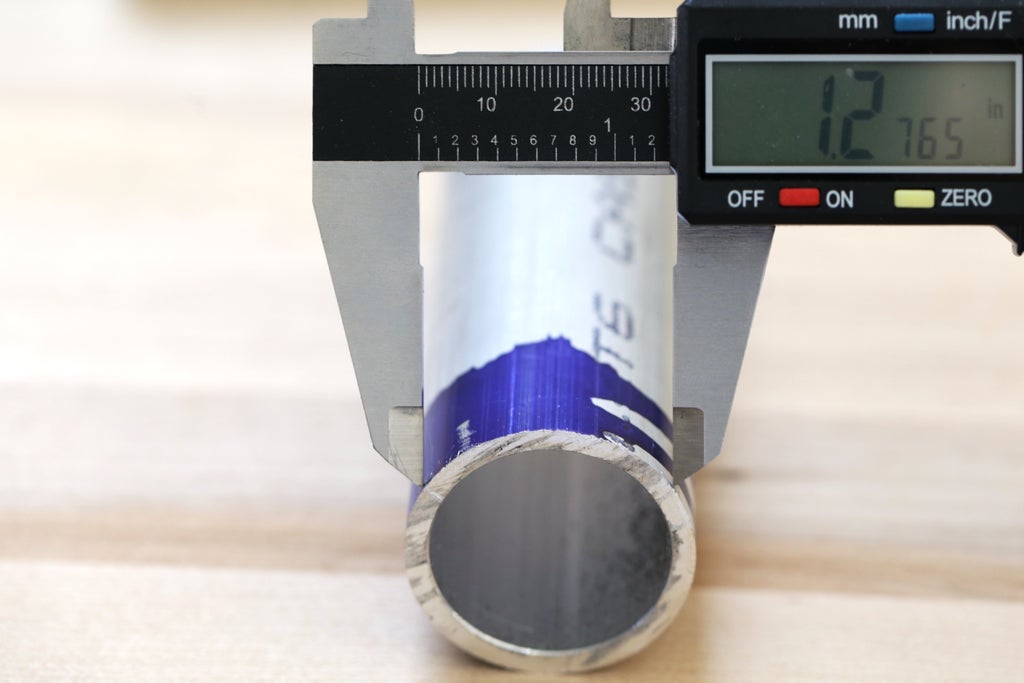
Tie a marking 0.2" parallel to the edge of the aluminum subway system.
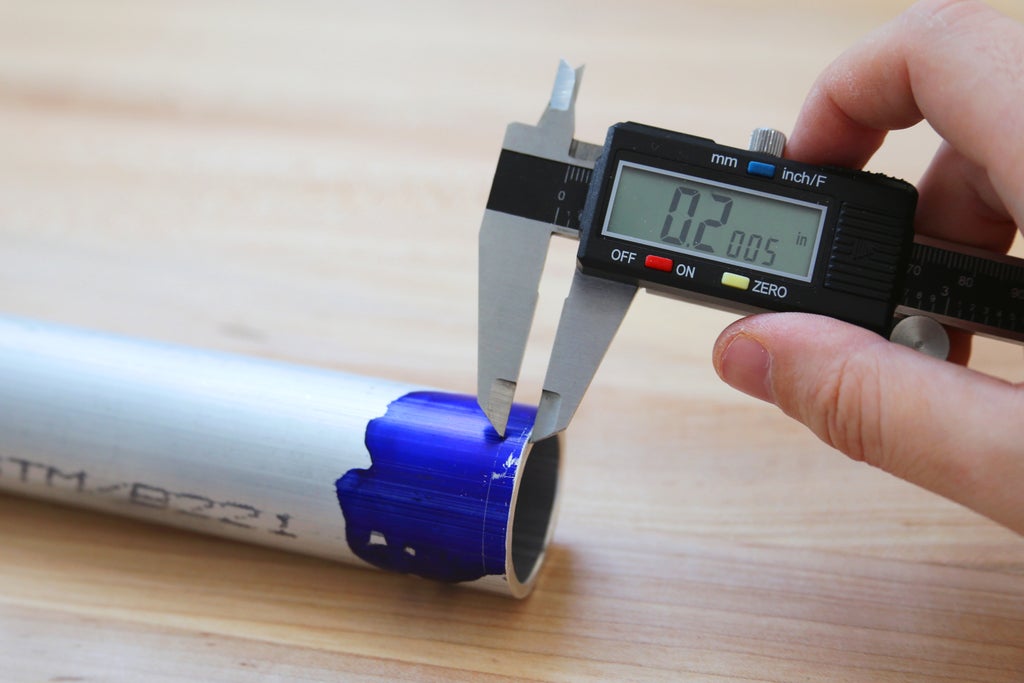
A trick for doing this is to employment a put on of calipers. Dial the jaws in to your measurement, and use the set turnkey to interlock it in place. Use single jaw to follow the edge of the tube, and the other to trace a marking around the circumference.
Step 8: Measure and Mark Again
Next, you want to use a scriber to draw perpendicular crosshairs along the perimeter run along that you have just measured at three equally spaced points around the perimeter of tube. Figuring proscribed three equidistant points along the surface of a round tube is same difficult. I would not adjudicate you if you eyeballed this to get IT flop, as the precise spatial arrangement is not entirely central for these holes.
However, should you privation to embody precise, you force out use your calipers to measure an equiangular triangle on the assaul opencut of the subway, and then drops lines down to intersect with the circumference melodic line. The points should be approximately 1.275" aside.
Step 9: Nerve center Punch
Now is metre to lick a dimpled chad into the three crosshairs that you conscionable marked. This will generate the drilling bit a starting channel to spin in, and prevent it from wandering off-center. If you drill without first doing this, your drill bit will wander concluded the piece of metal.
To bring i this indent, commit your part on a nice firm surface and go bad grab a punch. This can live either a elastic device punch, or a more traditional heart punch.
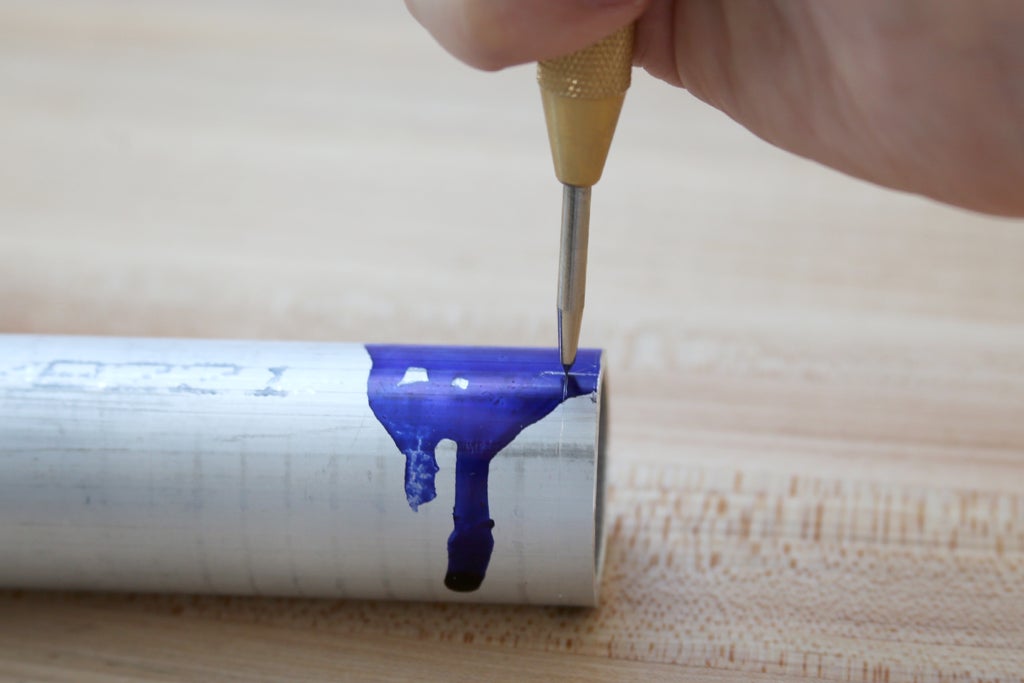
To use up the jump-loaded punch, place the tip of the punch on the center point and push down until it forcibly kicks back at you. This is quick and easy.
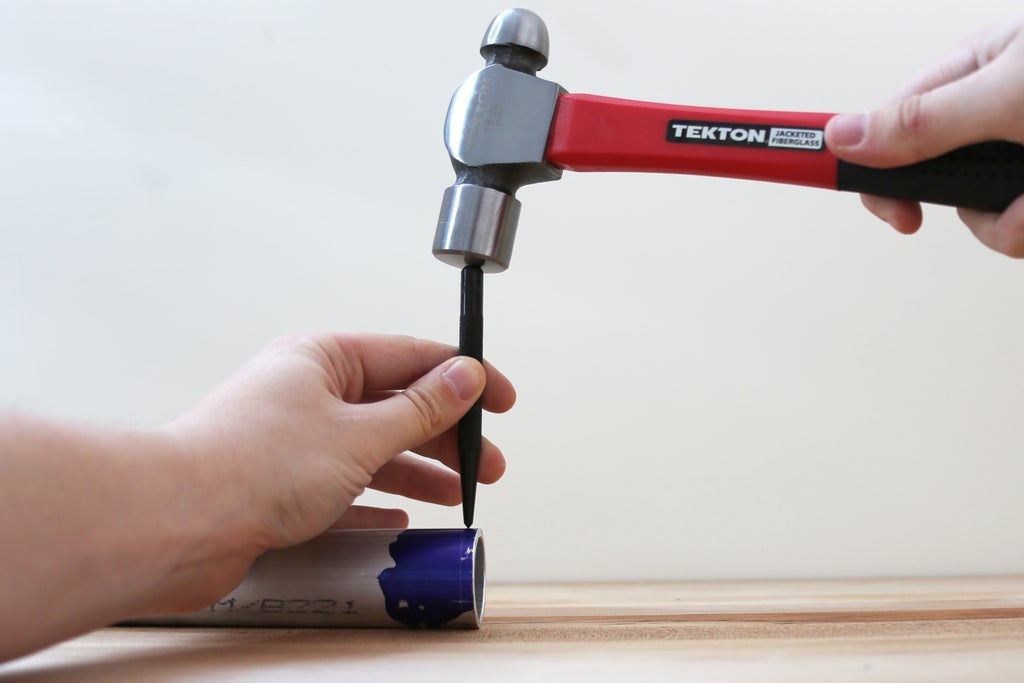
A traditional eye punch potty leave a better marking, but it is a less snatch trickier to use as you have to align the puncher with one hand and give it a swift hammer tap with the other. As you will card, doing this to a round surface (that has a tendency to roll) can get a little tricky.
Step 10: Clamp
After punching three dimples, clamp the aluminum tube in the vise with one of the revolve around punched dimples look-up and centered.
Notice that the orbit I am about to drill is clamped firmly in the jaws of the bench vise, A conflicting to hanging a bit turned the edge. This is to ensure it stays firmly in situ while it is being drilled.
Footfall 11: Position the Drill
To start out, enclose the shank of the drill bit into the chuck and tighten it firmly in place.
Place the practice session bit centralized in the dimple left behind by the center punch.
Step 12: Begin Drilling!
Next, it's time to begin drilling.
When you are boring, if you are seeing lots of small flakes, you are going through with the material with the rightfulness speed and pressure (feed). This bequeath take in both trial and wrongdoing to get right.
Step 13: Drilling Pointers
If you are seeing long stringy bits of metal whorled out of the hole while drilling aluminum, it agency that you are applying also much downward pressure and/or your drilling bit is spinning at the wrong speed.
These stringy bits can get wound around the drill bit and embark on to spin about. This is non good because they can be sharp, and possibly spin and cut you, operating theatre terms your work piece (more likely with blade than aluminum). Hence, this should live avoided.
To give up this from happening, backward the drill bit out slightly to cut short the chip (metal strand). Then, adjust the speed or amount of pressure being applied until you jump acquiring nice small chips.
A common technique used for getting nice small chips is to use pick at drilling, which means that you move the drill bit descending a little bit, back off to let the metal bright, and then repeat. This is through until you are the whole way through.
Step 14: Close Enough...
A you wish bump, even with a center lick, manually getting the hint of the drill fleck perfectly on center is very catchy with a pass on drill. It will likely be off slightly (especially when just acquiring started). Don't worry about this. This is ok for the project that we are making.
However, this is ultimately why hand drills are inferior preferred than a drill press for metalwork. A Mandrillus leucophaeus press allows you to perfectly position your part and clamp it into situatio.
Step 15: Moral the Edges
Drilled holes, equivalent cut off edges, leave bottom burrs. Typically, these stern represent easily filed away.
Since our burrs are happening the inside of a round of golf rise, we will want to use a circle lodge to remove them. You don't call for to get too great here, just file out enough to remove them. If you can run your finger over the hole and the surface feels generally flat and smooth, IT's good sufficient.
Step 16: Repeat the Process
Drill and deburr the left holes if you have not done so already.
Once you have completed this, you are now ready and waiting to move onto the Fasteners Lesson.

Did you find this useful, fun, or entertaining?
Follow @madeineuphoria to see my latest projects.
Be the Number 1 to Contribution
Recommendations
-
Anything Goes Repugn 2022


Source: https://www.instructables.com/Drilling-Metal/
Posted by: foxsaisuatecous.blogspot.com
0 Response to "Drilling Metal : 16 Steps - foxsaisuatecous"
Post a Comment